Monday, June 13, 2016

Electrical Project and Fantastic Fan installations

Electrical Upgrade -- Counter Power Outlet - 3 hr job
We have been looking for a good place to have a power outlet added so we can have power for the toaster and the coffee pot rather than trying to have it near the bed or on a box over the sink.  Since we have the cover on the stove now, that adds some counter area that made the back corner of the pantry possible for the power box to be installed.  When doing the smart tile the other week, I traced out the recepticle box and left that portion of the tile job open.
No Turning Back Now,... first side is cut for the outlet 
I made the cut using the spiral side bit on the dremel tool, which worked very well to trace the opening.  The pantry wall is a double application of a luan plywood, so I then pre-drilled the corners from one side to transpose it to the inside of the pantry to make the second cut.
Careful Measuring, Pre-drilling corners, leads to good results
All complete and wired, will be nice for our next trip.
Didn't take to long once I had it cut to get the box installed.  I took a piece of 1x4 to slip in between the two luan panels so that the box has good solid support.  Two small screws on the pantry side secure the wood and then the box easily installed to the tile side of the wall.  a few minutes later and I had the outlet wired and ready to connect to the breaker panel below the pantry.  After pulling the converter, you have access to the 120V wires coming in the back and can feed the new line thru the romex connector to the power panel.  I matched this up to a proper breaker and installed.  Don't forget to label the breaker.

Fantastic Fan Installation - 3 hr job
The first step of getting ready to have the fan installed, besides ordering it, was to open the 12V side of the power panel and be sure I knew which fuses controlled the wires in the camper.  I saw that the labels were not completed as I have wires hooked up to all positions 1-11 and fuses too.  So, I pulled all the fuses and started one by one, finding the 12V lights, fans, awnings, etc that came on with each fuse.
12 Volt Fuses Identified
Working on the roof requires some protection as I'm not sure if our roof is rated as "walkable" since we don't have a ladder or it stated specifically in the manual.  On the forums, it was suggested if you don't have a ladder, it is likely not "walkable".  So, I used 1/2" foam board about 4'x4' square on the roof membrane and then a piece of 3/4" plywood that I had left from building my daughters American Girl Doll House.  That would distribute my weight across the roof supports and also provide me a good surface to lay on, stand on when getting off the ladder, etc.  In the photo above, you can see that on the roof with my putty knives and tools needed to get the old vent cover off.

Take your time, even though you are sweating the pounds off.....
 The first task is very time consuming and unfortunately, hot.  You want to have a good warm day with the camper in the sun to help soften some of this Dicor sealant as it is very much like chewed bubble gum that has been stuck to a table.  Patience is key, so you don't poke a hole in the roof membrane.  My fingers were quite sore after this from trying to pry it back and roll it back with my fingers while working it with the plastic putty knife.
Removed roof vent
Once the sealant is removed and the screws as well, you can carefully pry up the roof vent.  This still took time with the metal putty knife to break it free from the sealant below the flange.  Working around, I finally got it free and didn't damage the roof.  I did take my staple gun then and re-attached those flaps that folded into the camper to the wood edging that I had on three sides.  After the sun softened this up for a bit, I worked on cleaning that up too.  At this point, I was well into the project for over 2 hrs, with the easy part now ahead.

I used a mounting gasket/putty around the flange of the new fan and carefully pressed it down onto the roof.  I worked from one side to the other to secure with screws, first by hand, and then I used the drill with the clutch set lightly.  Once the putty squeezed out evenly among the fasteners I stopped so I wouldn't over tighten and strip out the wood.Then, down inside the camper I went.

Inside the camper wasn't much cooler,... although it was nice to be out of the sun.  I checked the polarity of the wiring to verify colors.  Unfortunately, the fan uses black as the (+), as it feeds to the fuse first and then to the switch, and the white as (-) or Ground.  This is what the instructions said and I verified, as the little positive sticker they put on was located on the White wire. The light wires in the ceiling were White-Red (+) and White (-).  I carefully made these connections with wire nuts and electrical tape, although i could have also soldered them.  Once properly secured, the fan was tested and worked great on all three speeds.  Back to the roof for a final sealing.

Final Sealing with flexible roof sealant
 I sealed over the fasteners and down the side of the flange, and then smoothed it out using my plastic putty knife just like doing icing on a cake,... which, you may say I'm not that good at!  The sun smoothed out the final appearance a little as the stuff setup and it should provide a really good finished product.  This vent will be protected by a MaxAir II cover as well, so this joint should hold up a long time.
Baffle trim installed inside
Inside just needed a little fitting with the garnishing trim baffle and to attach the screen to the fan.  I'm really happy with the installation and this should help make things nice to vent when cooking, move air when we don't need the AC on, and especially when at Assateague camping this summer.


Monday, June 6, 2016

New Back splash!

Been working on finishing up some projects around the camper since we have some time between now and our next outing as another school year is coming to a close.  One of those was to personalize our camper with a nice back splash area around the camper.

SmartTile is a self-adhesive gel tile product that looks great and is easy to install.  It has become popular in RVs and Campers due to this ease of installation and the flexibility to handle any movement during transit, etc.  There are a few styles that we thought would look nice in our camper, and then one really stood out when we took them inside.  If you are in the market for a real tile, check out the Flex-Style system on Google.

Installation is easy.  First, clean the walls where you want to install them with rubbing alcohol or a tsp de-greaser if you have been using the camp stove for a long time.  After a good cleaning, check the surfaces for any defects that could ripple thru.

I found that I also had to check the squareness of the counter to the walls, as they were both out a little bit but enough that the first tile of each row would have to be trimmed on an angle to get it started correctly.  Here is a photo during my progress.  The rectangle that is left open is where we will be adding an electrical outlet,... more on that below.
Off to a good start
Tile part all done,... now time to add the electrical outlet
 YouTube VLog of the Installation to this point.
( Click HERE to watch larger on YouTube directly)

The electrical outlet is something that we have been looking for a location to place.  We need it to be someplace accessible for the toaster and the coffee pot.  This wall seemed to be the easiest location for placement.  The pantry is just above the converter and breaker box so I only have to clip the one removable shelf and drill one hole in the base of the cabinet space to route the wire.  Since the side wall of the pantry is a thin plywood veneer, I will reinforce that section with another layer as I fit the electrical box.  More to come on this.


Afterward, I had some scrap that I was looking at and thought it would be nice to add another personal touch to the fridge and make this look more than only a back splash add.  This looks better in person than this photo shows, and was easy to install here as well.
A little matching touch on the fridge

Sunday, June 5, 2016

Popup Gizmos for the Hybrid

When we had our popup we were very active on the Popup-Portal web forums which is where we heard about Popup Gizmos, the tent end covers for your canvas that really make a difference.  Our camper canvas was spared from the UV, tree sap, and extra heat that they would normally see during the hot summer camping trips.  They made such a great difference in keeping the camper cool and protected, we new we had to invest in them again when we purchased the hybrid.  So, a little overdue, but we finally purchased a set this season and were able to get them in time for our last camping trip.

Here are a few images of them in installation on our hybrid.  A little more tricky than attaching to a popup since we have to work on a ladder most of the time to get them in the right position rather than velcro or clamps before raising the roof, but, very much worth the extra time to get them in place.

Fresh out of the box.
Preparation, have the clips handy when installing
Clips hold it to the aluminum bunk edge frame / drip edge during install
Raise the shepherds pole and then secure the cords around the bed
At the front, I took the clips to the weight distribution mounts
All installed, and in time for the rain.  Extra material at the front laps nicely
We chose the super high wind covers as they have the bungie straps that keep it in place rather than just clamps, but all versions work well.  The material is tarp like, and has reinforced sleeves where the bungie cords were installed thru.  Note! When you get them adjusted, make sure to knot the clips on the cords.  The loose knot that is on them from shipping is easy to adjust, but also if you don't secure them you will find one missing here and there!

The little extra length is nice as it will wrap around the front of the bunk and keep the water flowing off.  Also, these darken the inside of the camper at the bunks which is a great advantage for the kids!  These will definitely be great for Assateague Island this year.
If you have a 2016 Keystone 217 exp 3 bunk, just tell that to Bob when you call.  My measurements are now on file.

Get yours from Bob here at www.popupgizmos.com !!

Also on Facebook! 

Sunday, May 22, 2016

Backup Lighting project continues.....

Worked a little more on the backup lighting project to complete the LED wheel well lighting which will light up the wheels when I am backing up so I can see them and any obstructions.

I purchased the LED strips at AutoZone which included two 4" long White LED segments backed with 3M automotive adhesive strips.  To install them I found that I could place them inside the metal trim strip lining the wheel wells.  There is a strip that I could install and secure the wires with some super strong gorilla tape and some washers installed over the existing screws.  Some silicone adhesive would be good as well for the tough spots.
Only a few basics needed for installation.
Prior to beginning the installation I cleaned the trim piece with water and soap, and after dry, I cleaned again with some rubbing alcohol to be sure it was good and clean for the adhesives of the tape to bond.  I first placed the lights and tested them, and then slowly worked the wire towards the back of the wheel well.   As I approached each trim screw, I backed out the screw, ran the wire and tape, and then added a washer to the screw to clamp the assembly back together.
The LED Strip on the trim and the protected wire.
The overall goal is to have these light the wheel well area lightly but also the surrounding ground so that we can see where the wheels are and the boards we are placing there or any rocks in the way as we back into the site or the parking spot here at home.  They are wired to come on only with the reverse lights that I added at this point (Yellow Wire in the Harness), but I do have the ability to separate them later and have on a switch if needed.
Testing them out, work great!


Thursday, May 12, 2016

Colonial Woods Weekend #3

Yes,... another weekend at Colonial Woods.  This year we really took advantage of their spring special offering by camping these three consecutive weekends.  This time, since it was Mother's Day weekend, we drove separate over to the camp so that I had the truck to tow our camper home and Becky and Bella could leave early on Sunday to attend the Mom and Daughter Painting in East Greenville at Art On Main.

Pennsylvania has been a monsoon the past 7 days, nearly raining each day.  I think we have gotten nearly 2 inches of rain total which was supposed to break by the weekend.  Well,... it didn't, and we had scattered showers on our arrival with some throughout the weekend.  We made the best of it though and still got to do lots of fun activities and fishing.

Madison exploring with her umbrella
Yes, a photo of me relaxing!
My lovely Becky cooking up some grilled cheese today!
After lunch on Saturday the girls wanted to go fishing at the pond.  Of course, we get there and 10 minutes later Bella doesn't want to fish anymore.  But, we stuck it out for a while and then we were starting to get some activity.  The girls were catching some bluegills here and there and then we caught a few nice bass!  I managed to pull in a small trout too before the day was over.  It's always fun how the kids react when they get a decent fish on the line and now they are all able to handle most of the fishing themselves, it has made it more enjoyable for Becky and I.  Here are a few snapshots of our catch!
Madie caught,... well, reeled in a bass.

Bella didn't want a kiss from the fish!

Ally caught it by herself!  Biggest of the weekend!
I'm glad we had a mild winter as that left me plenty of camp fire wood for this season.  However, if I burn it all, you know next year will be very cold and I'll be running short.  Nice hot campfires are the best on the damp days in the woods.  We all huddled up around the fire each night when we had it going.
Warm campfires each night were great!
We had an early campfire so we could go and play BINGO at the lodge.  $2 each to play, with cash payouts of $5 for regular BINGO and $20 for specials.  Then, the Coverall is the rest of the pot, usually over $100.  Tonight, Becky was the winner on the "X" special and came back with $20 bucks!
Back home on the enlarged parking pad and drying out in the SUN!
Time to get back to making some modifications to the camper and doing some work around the house.  No trips for a few weeks as that gets done, but I"ll have some more posts regarding the modifications I'll be working on.

Monday, May 2, 2016

Colonial Woods - Weekend #2

Weekend #2 at Colonial Woods was a damp and chilly one, with little sunshine and lots of rain coming in on Sunday.  What a difference a week makes in the weather and the campground was only at about 40% capacity compared to last weekends nearly full house.  This was nice though as the kids could ride around the drives without much traffic to be worried about.

As a surprise to Isabella, we invited her best friend Courtney to join us camping for the weekend.  Her dad brought her over after work, shortly after I got home, and we were off to the campground.  Since it was dinner time on our arrival, we stopped and picked up some pizza at a nearby Pizza Bella, which made it nice as I was busy opening and setting up things.  The forecast had rain in it for Friday evening with some scattered showers and then a cloudy and damp day on Saturday.  Luckily, the rain held off and the canvas stayed dry on Saturday afternoon.

That's a lot of streamers,.... 
Who's That?.... PopPop stole Bella's bike and is riding with Madie
Since this weekend was so empty at the campground, so would be the lake.  When Pop, Ally, and I arrived we were the only ones there and it seemed like the fish would be ours for the taking as they were hitting the top out in the middle.  Pop caught a trout, but it rolled free as it got to the lilly pads at the edge of the lake.  Ally was catching bluegills like crazy.  She would barely have the bobber hit the water and she was able to catch another.  Those special wax worms of Pops were the ticket.  I managed to get three bluegills, but nothing else.  Pop loosely hooked another trout which got away at the shore when they went to net it.
Ally,... Ally,... this fishy is hungry,... and Pop is waiving!
Ally caught another one
My Cutie, Cowgirl Madie waiting for the big bite
Everyone had a good time fishing even though we didn't catch any really big ones.  Maybe next time we can get a big trout or catfish!

Back at the campsite the girls took to riding the bikes again and also playing in the creek.  The weather was holding off and the heavy rain was forecasting to arrive early Sunday morning.  I noticed that the rear bunk upper corner looked different.  I don't know if it was something the kids did or if it just worked loose somehow, but the plastic canvas jointing that holds the canvas into the metal track was popping out in the corner.  I had to unscrew the trim and pull of the plastic trim piece for the bunk and I was able to stretch things back into place and use a flat blade screwdriver and some pressure.  The white canvas joins into this door jamb trim with a snap and slot type system, so maybe it just wasn't clicked in right and took this long to become noticeable.  Trim piece installed, I'll keep and eye on it.

Courtney with her crayfish catch 
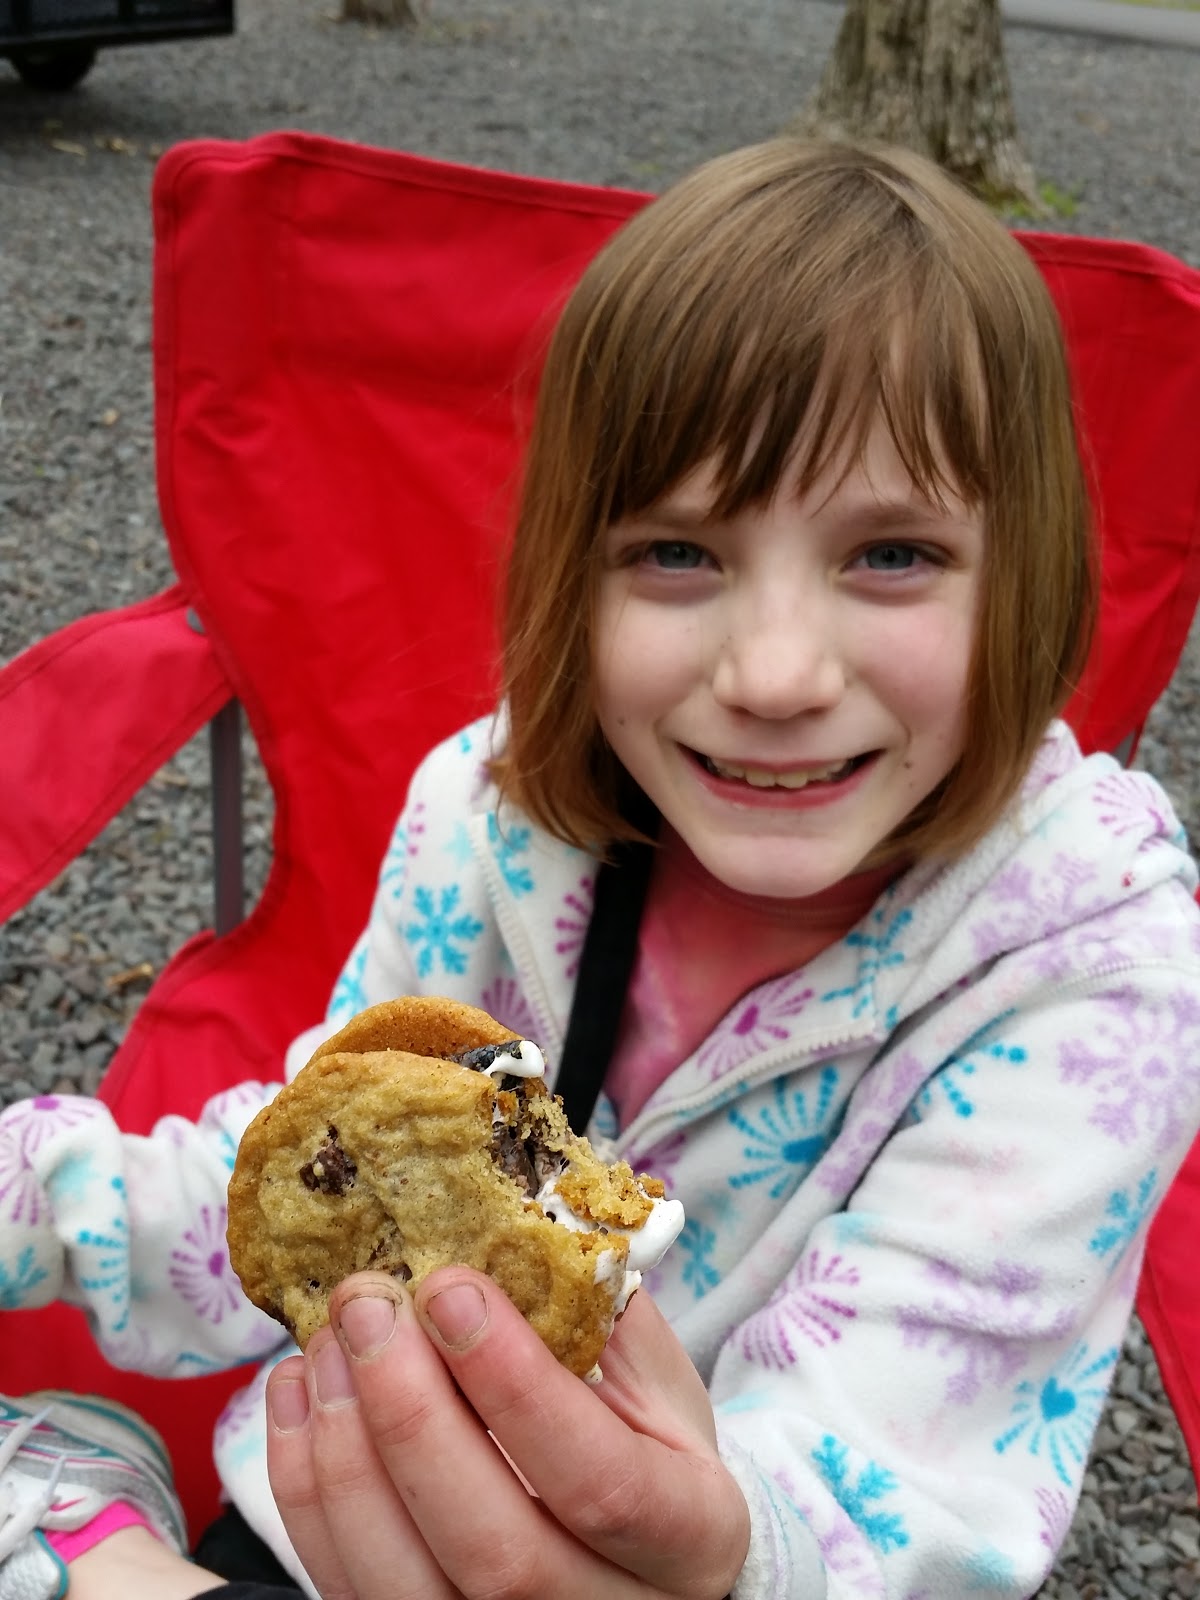
With the cool damp air, campfires are a must.  Since there was BINGO tonight, the fire was started early and we had dinner and campfire S'mores at the same time.
Super S'More = Chocolate Chip Cookie + Thin Mint + Marshmallow 

Makin S'Mores!
MMmmmm.....Yes,.. Its that good!
With the heavy weather in the outlook, we decided to clean up and pack it in for the weekend.  We wouldn't have an issue if we were taking it home on Sunday, but I didn't want to leave a wet/damp canvas closed up camper all week.  Becky and I packed things up and then everyone went to BINGO.  Even though a late night by the time we got to the house, it was a smart decision.  So, another weekend done, albeit a little earlier than we had hoped.  We will be back for Weekend No 3 and then I'll have to pack everything up and tow the camper home to the improved parking pad.

Tuesday, April 26, 2016

Colonial Woods - Weekend One

First Weekend of Camping!!  Couldn't get here fast enough with the work weeks and things that have been happening here around the house.  It took a few days to get some time after work to get the camper ready and go over things from the winter.  Water lines sanitized and flushed, Battery Installed after a water level check and float charge, LP Tanks installed and connected, and a few other "Springerizing" items.

Becky and I loaded the camper with new supplies for this season and double checked we had the kids toys, blankets, sleeping bags, etc all ready to go.  During the day at work, my friend Jim texted me this photo as he flew his Cessna overhead of the campground.  He also would be camping with his family this weekend and had taken the day off work to enjoy some airtime.

Colonial Woods from the Air (Taken by Jim R. in his Cessna)
 By the time I got home from work and the kids off the bus, we only had to do a final walk around and we would be ready to go.  We added two zip lock bags of ice to the black tank to stir any leftovers up from our last trip, even though I had flushed the tanks the best I could at the end of the season.  We arrived to the campground a few minutes after 6 pm and circled through the campground to the dump station.  After the initial dump of the tanks, we headed to our assigned spot down by the stream.  It took me a little bit, but I was able to back in the spot easily and we were side-to-side level without using any blocks under the wheels.
We have Arrived!

All setup for our Weekend!
 Across from us there were 4 other Keystone Passport models, including a very nice couple that had the same model 217 as we have!  After some talking on Saturday with them and comparing models, seems that the 2016 models of the 217 have some variations depending on time of manufacturer.  They had some minor upgrades in lighting and we had a different interior finish.  Overall, both of us were very happy with the Passport quality.  This was there first outing and I hope we can cross paths again with them in the future.

Must be a Keystone Convention!!  Lots of Friendly neighbors this weekend.
 The kids were right at home so to speak with our site next to the stream and we tried to re-create some photos that we took 3 years ago when we first visited Colonial Woods.  Here are a few snapshots from these new and updated photos.

3 years ago they sat on the same bridge,.... much smaller then.

Trying to re-create a photo from a few years ago
 Bella was itching to challenge me at Chess since she learned to play a little at school.  Even in her Harry Potter books when they play Wizard Chess, she talked about playing me.  So, we pulled out the chess set and played a quick game.  Yes, ... Quick.  She didn't think ahead on some of her moves and left the door open to a Checkmate.  Sounds like I have a rematch coming up next weekend.

Bella, about to get Schooled in Chess
The remainder of the day the kids caught crayfish in the stream and played games.  They didn't have much interest in going fishing so maybe we will hold that till next weekend.  We enjoyed a good BBQ chicken dinner followed by a good hot campfire and s'mores!  YUM!!

On Sunday afternoon we decided to avoid the campground as people were packing up and doing the conga line to the dump station and took the new trail from the campground leading to Lake Warren State park.  We haven't been there before and it was a very nice lake.  I'm sure there are more trails and things to go around the lake but we were able to see a Beaver dam and also some new trees cut from the beavers!
Lake Warren

The Beavers have been busy
 So, after another great weekend at Colonial Woods, we began to clean up and get ready to head home.  It was about 2pm at this point and many of the people in the campground had left already.  That is another good part about doing the Spring Camping Special here, there isn't the time limits to checkin and check-out.  Lets see what next week brings!!
Locked and Secured till next weekend