Tuesday, April 30, 2013

2013 - Trip 1 - Colonial Woods Campground

It's FRIDAY, we are OUTTA HERE!  (our house is the one with the American Flag)
COLONIAL WOODS CAMPGROUND

Friday:
Work week behind me, I was anxious to get the van loaded and get to the campground.  Weather was looking perfect for the entire weekend with High temps projected between 65* and 69* and sunny, and cool clear nights with temps in the low 30's.  Becky, Madie, and I dropped off the older girls at school and then we enjoyed a nice breakfast together at the West Main Diner in Lansdale.  Following breakfast, a last run to Walmart to purchase the camping groceries and a few fishing worms and we were home.  Packing begins my moving everything outside to the patio and then playing Tetris as I load the car with odd shapes and more and more stuff.  Oh,,... don't forget to pump up the air bags in the rear to 26 psi too.  Finally all loaded, I unplugged the camper from the house (I was chilling the fridge), and hitched the camper back to the van and it was time to pick the girls up from school.  At 26 psi, fully loaded and 3/4 tank of gas,... the camper sat level and we didn't have much sag in the van (See photo above).  

A short ride later, we arrived at Colonial Woods Campground for our restful weekend adventure.  Our campsite was huge this time and adjacent to a creek that the kids very quickly went to play in.  As always, Becky and I work together to get the camper opened up and the van partially unloaded, and then she works on the inside while I work on the outside getting things prepared and hooked up.  One of the first things that I do is check the shore power for voltage and proper polarity.  This is typically done by using my multimeter and sticking the probes in each of the three ports on the 30 Amp plug while trying to hold open the weather lid.  This year, simply plug in the meter on a pigtail and read the polarity and voltage.  Everything checked out well, and I was ready to hook the main line up from the camper.

Polarity Correct, Voltage 117, simple and easy to check now.
(LED did light for the polarity, camera didn't pick it up well, like the first 1 in 117.... )
I managed to retain Ally while the other girls went to the rest room.  So, here you go, crank down the stabilizer jacks while I get the roof unlatched.

Ally cranking down the stabilizers

A little "Home" decor
Finally all setup, with plenty of evening sunlight to spare, we took a moment to look at our campsite and our setup, the first of many in 2013!

All set up, and getting ready for dinner

Friday Night Smores at the camp fire
Evening came upon us, and the smores were being eaten by the fire.  Everyone was having a good time and the campground was full of great sounds..... "Little more,... to the right,... ok,.. You're Good,... STOP".... ok,... if you are not an avid camper, you don't realize how hearing others backing in throughout the evening is actually a little relaxing,...  knowing that you haven't camped since November of last year and the season is finally here again.  Knowing that you've worked all week, and now here and setup, it is time to forget the stress and worry and just relax with the kids and wife.

After a bit, we let the fire die down and headed inside.  The new setup for the kids sleeping was looking good and Madie liked her new bed arrangement.  Soon enough, they were asleep and the evening chill was setting in.  I went to turn on the furnace and the blower kicked on for about 10 seconds,.. then shut off.  Tried again,... same thing.  Uh O.... wonder what's the matter now.  Got the manual, repurged the lines of any air just in case, and tried again.  Blower comes on, no ignition on the LP, shuts down.  I logged onto the Popup Portal and did some searches for our furnace and came up with a few good hits.  After about 30 minutes of trouble shooting, I found a possible loose wire on the sail switch.  Crimped tighter and slid back on the blade connector, I tried yet again.  This time, the blower came on, the gas valve opened, and the ignition lit!  Back in business! We have heat!  Thanks Popup Portal!  Glad I had my meter and tools with me too.  11:15pm,.. time to turn in.


Saturday:
Fishing day!  Well, after some coffee for Becky, and Eggs & Pancakes for everyone!  Weather was looking even better today and we are off to a good start.

Becky's Camping Mornings start with COFFEE

Madie's First of the day

One for Ally

Becky's 12" Bass, caught on Bella's Rod, so Bella wants credit

Relaxing in the Hammock on a perfect Saturday afternoon
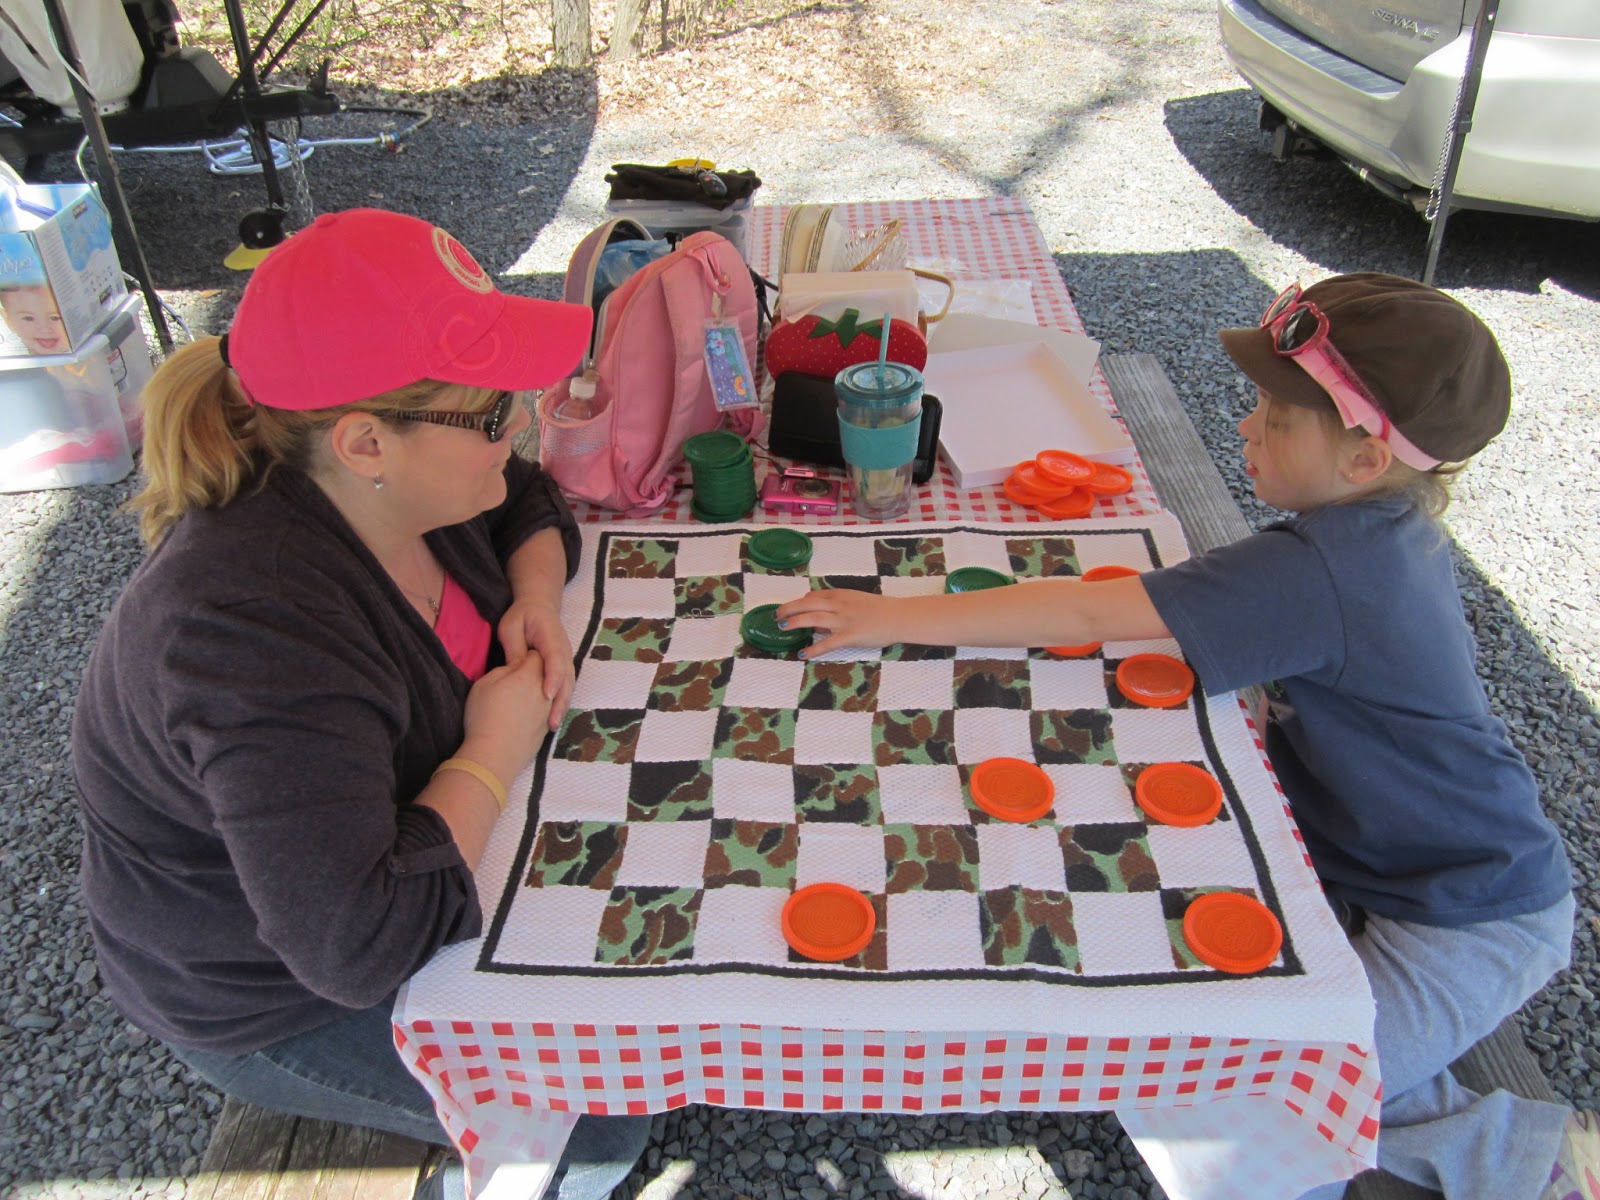
Nothing can beat a cool morning fishing with the kids and coming back to camp and relaxing.  No place to go, no phone to answer, just relax.  We ate some lunch and then headed over to Ringing Rocks Campground to see their sites and check out their facilities.  My brother Ryan stopped in to see us and take a break from the hustle and bustle of his weekend plans.  After the nickle tour of the camper, we relaxed a little and discussed his upcoming October wedding.  Soon he left, I dumped the gray water tank, and then I spent some time in the hammock swinging gently in the trees while Ally and Madie were playing in the stream and throwing rocks.  Becky and Bella decided to duke it out over a few matches of checkers.

Checkers 101

Three little monkeys on a Log
Sometimes, you get a surprise though.  While nearly falling asleep in the hammock, a few minutes later I hear Becky in the creek with her boots on trying to help the kids find crayfish.  Whoa!,... Becky trying to catch crayfish!  Yes,... I have photo and video to prove it too!

Hunting for Crayfish in the stream

Bella, Madie, Cousin Dante, and Ally, Ready to go fishing
Later in the afternoon Becky's brother Mark, wife Kamisha, and son, Dante stopped in for a visit and the rest of the evening.  Soon we were off to the pond again to try our luck at catching some trout or anything that would bite..... well, kids lost interest quickly this time and since nothing was biting we soon packed up and walked back to camp.  Along the way, motorcycle friends George, Lisa, Rich, and Tiffany also stopped in for a visit to see the camper all setup.


Another great fire with the kids and family, all roasting marshmallows and having smores, and soon the kids were falling asleep in their chairs.  Saturday night, the furnace started and worked without any troubles and everyone slept quite well after being active all day.

Sunday:
Another gorgeous morning,.... but today was different.  All around us people were beginning to slowly pack up there belongings and prepare for the trip back home.  We took our time and had breakfast, letting the kids then play in the creek with the old clothes while we slowly packed things up and organized the storage areas for our next trip.  It was about 11am or so when we finally closed up the camper and prepared to pull out.  Our next trip will be the busy Memorial Holiday weekend, when the campground is sold out and I'm sure it will be full of activity.  Our site then is on a crossing slope, which isn't fun for setting up and leveling, so I have to prepare some additional leveling blocks for the wheels and tongue jack. 

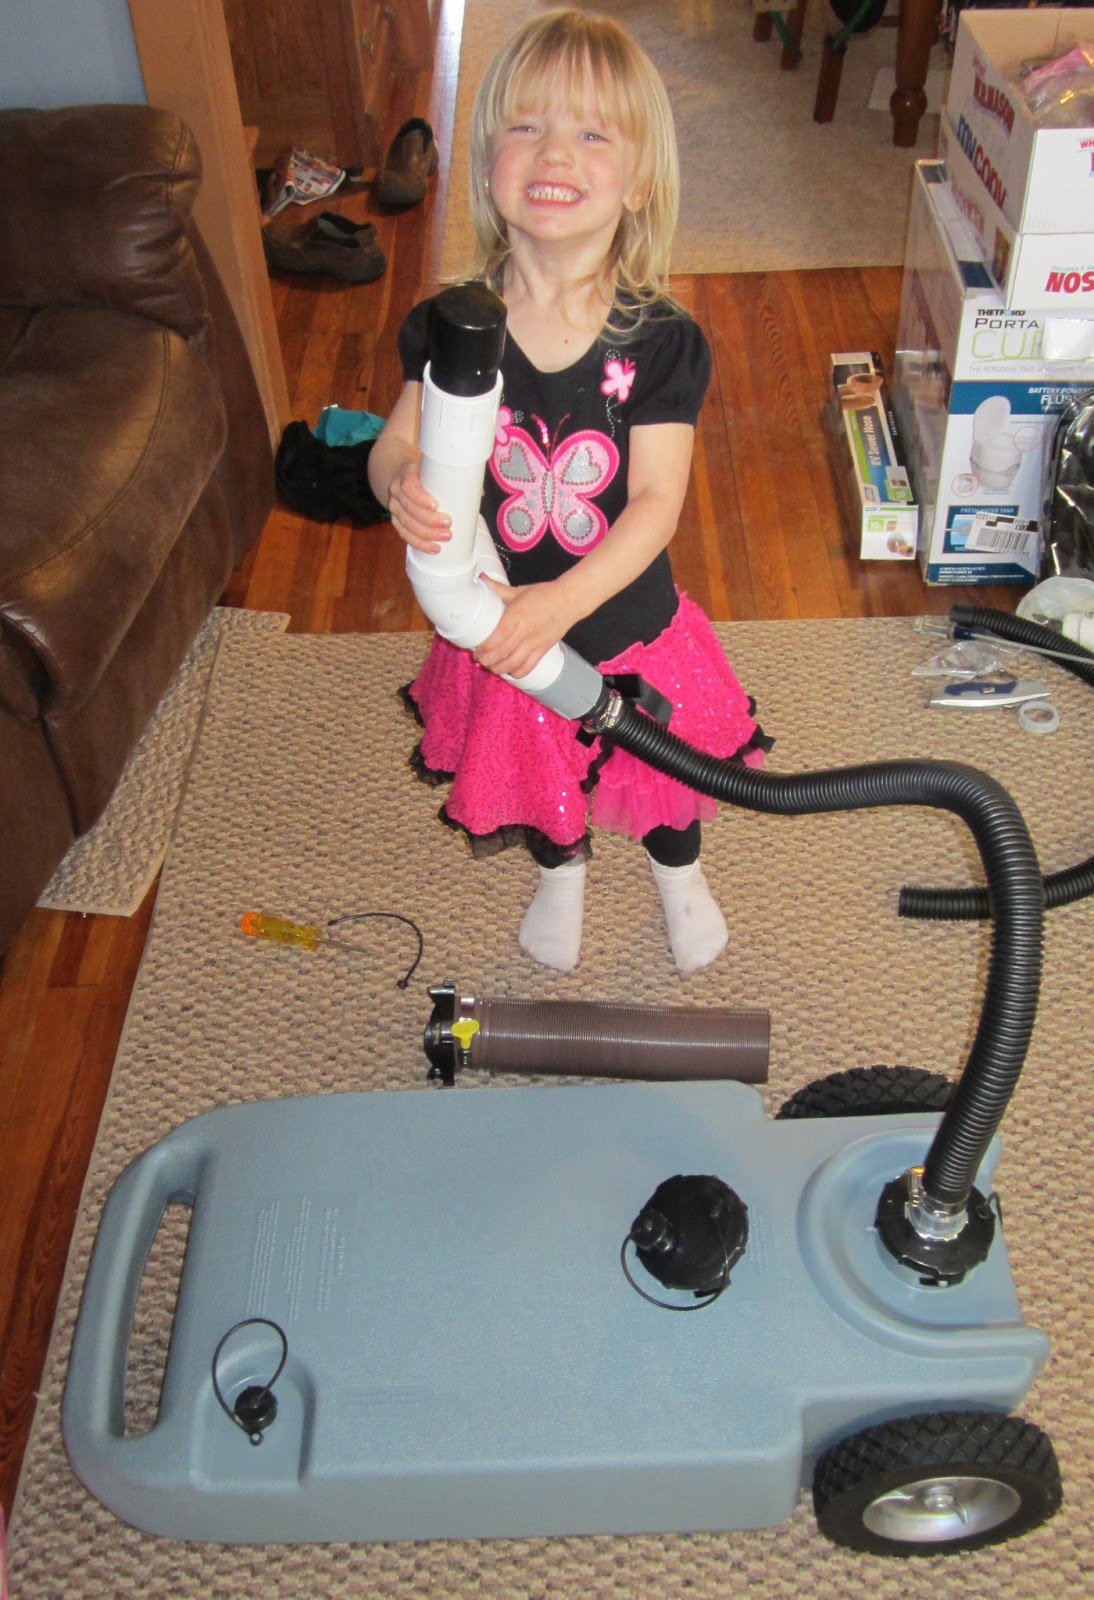
Full 1 1/4" drain system to 11 gallon Gray Water Tank, Works 200% Better!

Quick synopsis on our modifications.
  1. The gray water tank and drain works so much better, we don't hold back as much on the water usage.  The 11 gallon tank was nearly filled Saturday evening and needed to be trekked to the dump station.  The sink flows as well as at home with no delay now.
  2. LED lights inside are FANTASTIC.  Great light and very cool.  We could leave the light on for a while and I don't have any concern for the heat anymore.


Tuesday, April 23, 2013

Fixed sink drain... final prep for Friday Camping trip!

Tonight after work was all about getting the final stuff reloaded into the camper for this weekends camping trip,... the first one of the 2013 Season, and also finishing the repair to the flexible sink drain line.  As shown in my last post, the flexible line was kinked between the upper galley and cabinet below which caused it to crack and have pin-holes in the side wall of the tubing.  After some hunting around this weekend, I was able to pick up some replacement hose of the proper diameter and actually a nicer product too at Fretz RV Center in Souderton.
Cracked original hose from being pinched

I elongated the slot in the bottom of the upper galley with my dremel tool and sanded the edges smooth.  This helped reduce the back bending that the drain has to do before heading towards the trap that may have contributed to the pinching of the first hose.  I test fit the new hose, and trimmed the length just a little so that after the initial bend it has a straight shot to the trap without any additional sag or dip. 

Nice clean sweep from the sink above down to the trap
Now that Madie is 3 and needs her own space to sleep, we picked up an additional crib mattress on Free-Cycle.  We will have to figure out the sleeping situation this weekend, but at least this way she isn't keeping the older girls up.  Of course, popups aren't made with a lot of extra space to store such a thing,.. but then,... they haven't met me..... The Tetris Playing Car and Camper Packing Master!

Forward Area... carefully orchestrated
After some studying,.... the grey water tank goes under the one table area with the outdoor grill (black bag).  Then the back cushions and one seat cushion go on top of that table along with the outdoor table, outdoor rack for the grill, indoor table, and the step we made for the upper bed.  Then, on the other side (photo below), you have only the small pillows left which secure the mattress in place so it doesn't move, with the two other cushions stacked on top of one another to the left.  Two curved corner cushions on the floor, and our additional pantry rack, still fully assembled, lays on the floor.  BAM!  Beds still slide in with 3/4" - 1" clearance to spare!

And thus, the checklist is complete with the exception of two items that I forgot at the house.  Time to go Camping!


Saturday, April 20, 2013

Sink Drain and Gray Water Tank

So, as I posted before when we were doing some spring modifications, I noticed that the sink drain line was kinked and has a pin-hole in it.  At first it didn't seem so bad, as no RV Antifreeze was on the floor or on the outside of the cabinet, but I did find that it was absorbed into the wood of the upper galley.  Not noticeable from the outside or when in position, but still something I have to try and see if I can clean up.
Kink in flex drain and the RV Antifreeze Stain :-(
So, Madie and I went around looking for replacement hose today and couldn't find the same stuff or something as flexible as this is at the RV stores.  I did get a section of what they recommended, but I'll have to see how that compares when I get to open this up and try to tackle this project.  While I was at the RV Store, I did pick up a new Gray Water tank with rubber wheels,... yes, no more straining my back trying to tote ours in and out of the camper at the dump station at the end of the camping weekend.  I decided to go with a 11 gallon version, as we only have the sink feeding into it and that will be good for the weekend and extended weekend trips.

Clyde waiting for me to open the box so he can play in it.....

Now that I have a proper Gray water tank with a sewer bayonet,... it is time to Modify!

Say goodbye to the garden hose of a drain!  Now everything is going to be 1 1/4" diameter all the way to the tank,... combined with the vent,.. the sink is going to go Whooosh!  So we bought an extra bayonet fitting and then headed to Lowes Home Improvement store.  Back in the plumbing aisle we found a few things, but then we asked for some help to cut a hose we liked and the guy suggested looking at the sump pump parts.  Went over there, and wow, lots of parts and a nice hose for cheap!

Parts List:
1 1/4" diameter sump pump hose with press fit ends and hose clamps
1 1/2" threaded fitting to 1 1/2" slip on PVC coupler
1 - Bayonet Sewer Cap
1 - Metal electrical conduit lock washer
1 - PVC Conduit end open end cap

Tools:
Dremel, Utility Knife, Wire Cutter
Bayonet with 1 1/4" Conduit nut on the inside
 Dremel out the bayonet cap to permit the sump pump fitting to slide in.  Add the metal locking washer to the fitting, then silicone the inside and screw on the open end cap.  Nice and clean installation for under $6.00 in parts.
Metal Conduit lock washer on the top, and the rest of the 1 1/4" fitting

My helper holding the vented drain we made with the new sump pump hose

1 1/4" line directly connected to the Gray water tank

Dump Position, with sewer hose connection, Open the vent, and Dump!
I bought a 10' section of sewer hose (shortest and cheapest they had) and attached it to the sewer bayonet.  It was a tight fit, but after 30-45 seconds of soaking the end of the vinyl sewer hose in hot water, it slipped over the fitting a lot easier.  I then cut the 10' section in half with the utility knife and wire cutter.  Since it isn't stretched out, it will work well and gives me a nice short section to place into the dump station.

Best part is, I now should have enough sump pump hose to try and fix the sink drain too.  The sump pump hose is the proper diameter for the sink and nice and flexible.  I think the hose that the RV stores sell is nicer, but does seem stiff.  I'll have to check it out and compare with the drain line installed in the camper now.


Saturday, April 13, 2013

Safety Post

This weekend, I'm not going over to open and restock the camper, but rather working on the restock items and checking them for this season.  What are they?  Well, big one is the First Aid Kit.  Followed by the fishing gear, batteries, flashlights, and then the pots/pans/linens.

Last year we were fortunate enough to only need band-aids and minor things with the girls.  However, on the weekends we were not camping, it seemed that we had more accidents, including two trips to the E.R. since the big ones happened to occur on Sundays when the doctors office is closed.  So, we pulled out the first aid bin and went thru the contents, made a shopping list, and then went to Wal-mart.  Even though they didn't have everything we were looking for, it gave us a good start and saved us some money I'm sure.
Bella Didn't have RED duct tape, so we used Pink :-)

 Instead of a clamping lid storage container, we elected to purchase a cheap plastic fishing tackle box for this year and use that to organize our items.  Mainly, right upon opening it we have the variety of band-aids and ointments that would more likely be all we would need for the minor things the girls often complain about.

If the accident requires further cleaning, repair, or splinting, then we open the tackle box and Presto!  We have a mini doctors office at our disposal.

When I arrive to the campsite I also check the 30amp Shore power for proper polarity and voltage.  I had been doing this test by holding open the lid of the panel and checking with my multi-meter.  This can be a clumsy situation sometimes, especially if the power box has a lid that you have to hold up.  Why is this important?  Well, you want to be certain that you have the proper grounding for your hook up, as well as that your power is within the proper range to operate the equipment.  In the middle of July and August the power grid at the campground can be taxed for voltage if everyone is running their AC or equipment.  Having a low voltage condition can cause damage to the Air Conditioner operation, Microwaves, etc.  See this LINK for additional information.

So, I found a 30amp Male to 15 amp Female adapter for only $8.  I also found a combination Voltage tester and polarity Tester on Amazon.  Now, with one plug assembly, I can read the voltage at the shore power post and check polarity.  And, I can plug this into an outlet inside my camper to occasionally monitor the voltage.
The fishing tackle was also looked at and cleaned up, along with each of the kids rods and reels inspected.  Our first camping trip has a Trout Derby on Saturday for the kids, so we are hoping to start off the season by catching some big ones!  Now they can be taken over to the camper and stored in our slide out rod holder.

Now to get the batteries ready for the smoke detector, flash lights, and spares too!


Saturday, April 6, 2013

Finally! Spring is here!

This weekend the campgrounds opened!  But, we haven't had a chance to get the camper out and cleaned up until today.  This weekend has really nice weather (sunny and low 60's today) and our schedule was empty from other things so I was able to dedicate most of the day to the camper and some modifications.

1)  Mounting our fuse block and waterproof switches

In order to add some control and power to our system, I elected to add a waterproof box to contain a new fuse block terminal.  This protects our new accessories as well as our main system.  Waterproof toggle switches are mounted in the face plate of this casing and the fuse block is inside.  The wires run thru the side and are secured / waterproofed by sealing with clear silicone adhesive.

Soldering and preparing the terminal box in the basement

Mounted, and being wired in place
 The switches will activate the reverse flood lighting (left) and the auxiliary cooling fans in the refrigerator compartment (center).  The right switch is not yet assigned, but I'm sure we'll find a good idea sooner or later!

TJ helping run wires below the camper to the two destinations
 Parking on the asphalt made things much better.  We were able to use a creeper to get around underneath the camper to run the wiring and also to clean up the existing wiring with some new plastic cable sheathing.  This will protect our wiring system from road grime and the elements.

2) Rear LED Flood Lights

As you can see in the photos below, the camper is opened for the first time in 2013!  Everything operated well, but I still need to lubricate some of the lift system for this year.  Anyway, there are times when I can't leave work to early and we are arriving to a campsite in the later afternoon or evening.  Being in the woods, many of the times it may be helpful to have some extra light in the back for me to see where we are heading and to also see my wife's signals.  I found these 18W 6-LED flood lights on Ebay.  They only draw about 2.1 amps combined, and are as bright as the 55W H3 Halogens I have on my motorcycles.  I'll adjust the beams some evening, but I can adjust their up/down angle as well as the direction they are pointed with some minor adjustment of the mounting bolts.  A great buy, and I'm pleased with the installation.

Two LED flood Lights mounted and harness secured
Holy Brightness Batman!

3) Fridge Fan Modification

Last summer we camped in August at Knoebels and were unfortunate enough to have a site in the middle of the field.  95* plus outside, and the side of the camper baking as well where the fridge was.  After reading online at the PopupPortal and other forums, it was apparent that even from the Dometic manufacturer's manuals that a baffle should be installed.  What's a baffle you ask?  It is a board or sheet of metal that closes off the open air space to direct the air circulation over the fins of the refrigerator coil.  See the first photo below, there is about 3" of open space in front of the fins to the vent side.  As the fridge heats up, the air is supposed to be naturally drawn in the bottom vent and over these fins, then out the top.  Having this much space is very inefficient, especially when the hot and humid summer days are upon us.
Open space in the fridge compartment
To correct this, a sheet metal baffle is mounted to close off this open space and only leave the space at the fins available for the air to passively move over the fins and then out the top vent.  Well, sometimes the laws of thermodynamics don't work so well and this passive venting situation needs some help.  Enter, the computer fans.  These 4" diameter 40CFM computer fans are super quiet and only draw 1/2 Amp combined.  So on those hot humid days when the fridge is having trouble keeping the temp down inside, I flip the switch and these guys turn on.  It is always better to draw air out of a space than to try and force it in, so having these mounted behind the upper vent pulling air outward is going to make a nice improvement to the air flow and help the fridge work more efficiently.
I have enough wire if I want to add a thermal snap disk switch in the future.  Some people add these to the fins to detect when the fridge can use the additional help.  Open at 85* and closed at 110* or so, it helps regulate the use of the fans.  Drawing so little though, and since we connect to shore power, I don't see the need for it now.

4) Mud Flaps

Who likes road grime on their rear stabilizer jacks or jack screws?..... Bueler,... Bueler,... Bueler,....

Ok,.. so no one I guess.  Just thinking about that grinding sound it makes as the sand and junk is grinding away as you crank down the jack makes me cringe as I type this.  So, a pair of Mud Flaps on Amazon for a great deal, and 6 bolts later, we have mud flaps!

5) LED Replacement Bulbs

I commented last season about how hot the 12V lighting is and how I was concerned about the heat.  So, this year, we will be saving Amps and using LED bulbs.  The interior 921 wedge bulbs have been replaced with Warm White LED's of similar lumen ratings, and the step light has been replaced as well with an Amber LED assembly.  Now we can run the step light more often for the kids.

Step light LED replacement

6) General Cleanup and Checks

Also, it was time to check the camper overall.  The fabric and tenting was very clean and spotless, just like I left it last fall.  The storage areas and all the cushions look good, and all the windows were clean and clear.  The tires held the air pressure great, being at 44 and 46 psi, down from 50.  The spare was a little lower than 40 too.  All of them were reset to 50 psi.

TJ cracking a joke and having a good time, Thanks Buddy!
One thing I did find is that the drain for the sink has a flexible section of hose so  you can raise and lower the galley.  This section was pinched, and there is a small pinhole in it.  Luckily, non of the RV Antifreeze leached out all over, but a small build up of pink color was on the hose.  I'll pick up a section of replacement hose sometime this week or next to fix this when I come back.

All open and airing out.  Getting ready for another fun season!


In summary, today was fantastic and with the help of a good friend, I had a lot of laughs and made a lot of progress.  The remaining tasks I'll tackle as the season begins and as we make our first few camping trips.  I'm sure that once we start camping we will add a few more items to the list too!